Distance Measurement with Arduino
One of the simplest ways to measure the distance to an object is to use ultrasonic sensors. An ultrasonic sensor sends a signal inaudible to us and waits for the echo. From the elapsed time, you can then calculate the distance of the body that reflected the signal. This method is not suitable for all objects, but it is well suited for the detection of larger obstacles in front of a robot or of solid components in an automated processing system.

Required parts:
1 x Arduino Uno (or compatible)
1 x HC-SR04
4 x jumper cable male - female
The HC-SR04 Sensor
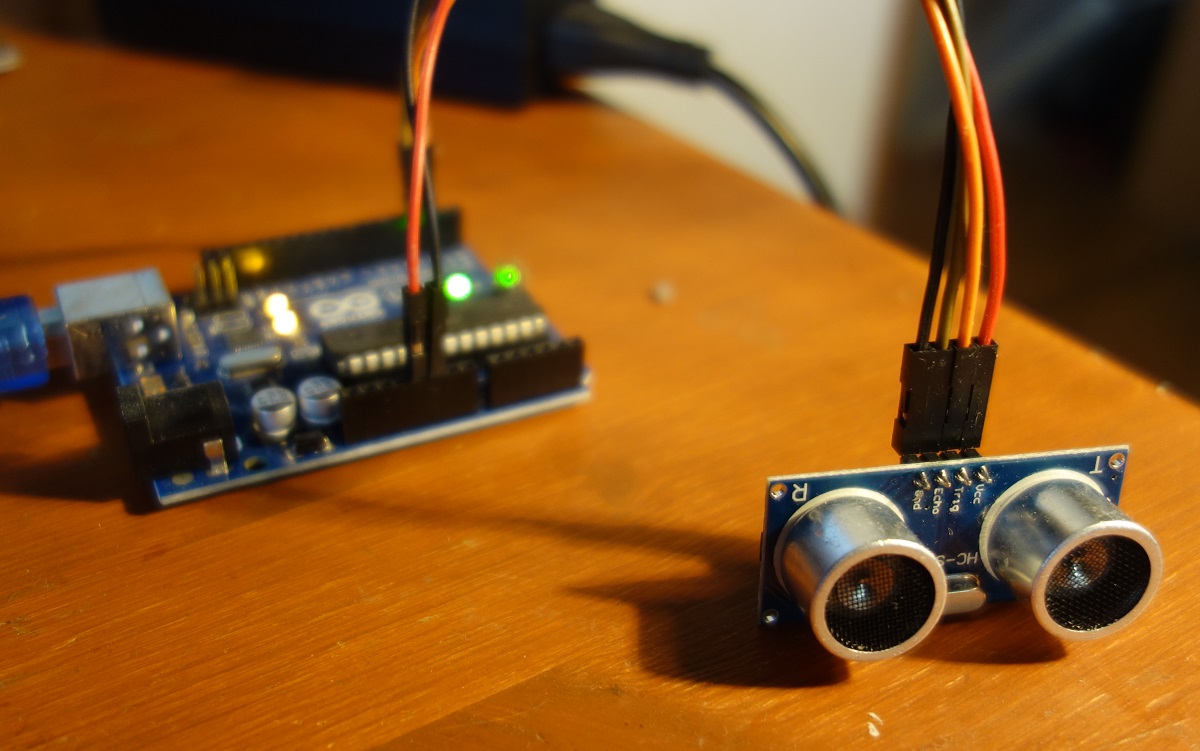
One of the most popular sensors of this type is the HC-SR04. The HC-SR04 is a very simple and inexpensive ultrasonic sensor and works well with all Arduino boards.
Doing the Math...
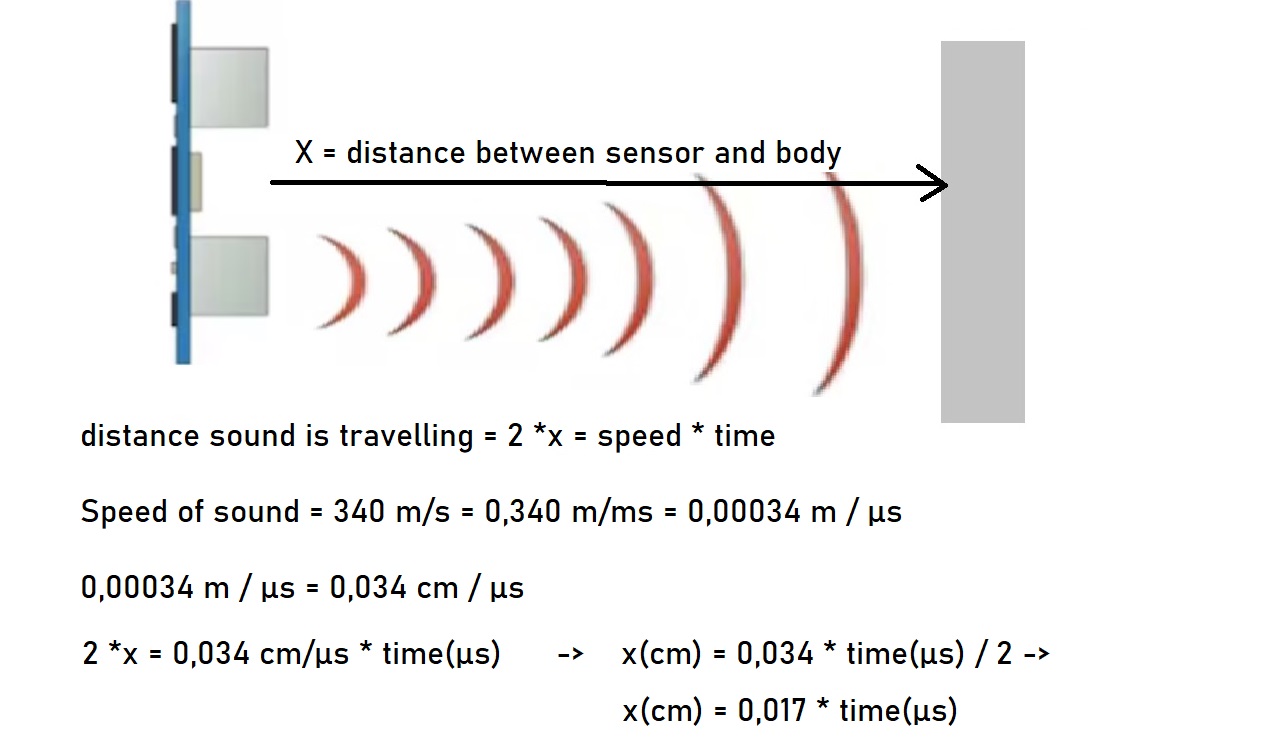
If you want to measure distances with the Arduino and the HC-SR04, you can't do without a little mathematics. An ultrasonic sensor sends a signal and waits for the echo. From the elapsed time, you can then calculate the distance of the body that reflected the signal. If we know the elapsed time and the speed of the signal, we can easily calculate the distance. The singal speed is given by physics with 340 meters per second, the time is measured with the Arduino.
Actually, the speed of sound is 343.2 m/s only in dry air and at 20 °C at sea level, any change in these parameters also changes the actual speed of sound, but the errors are far too small to matter for our distance measurement.

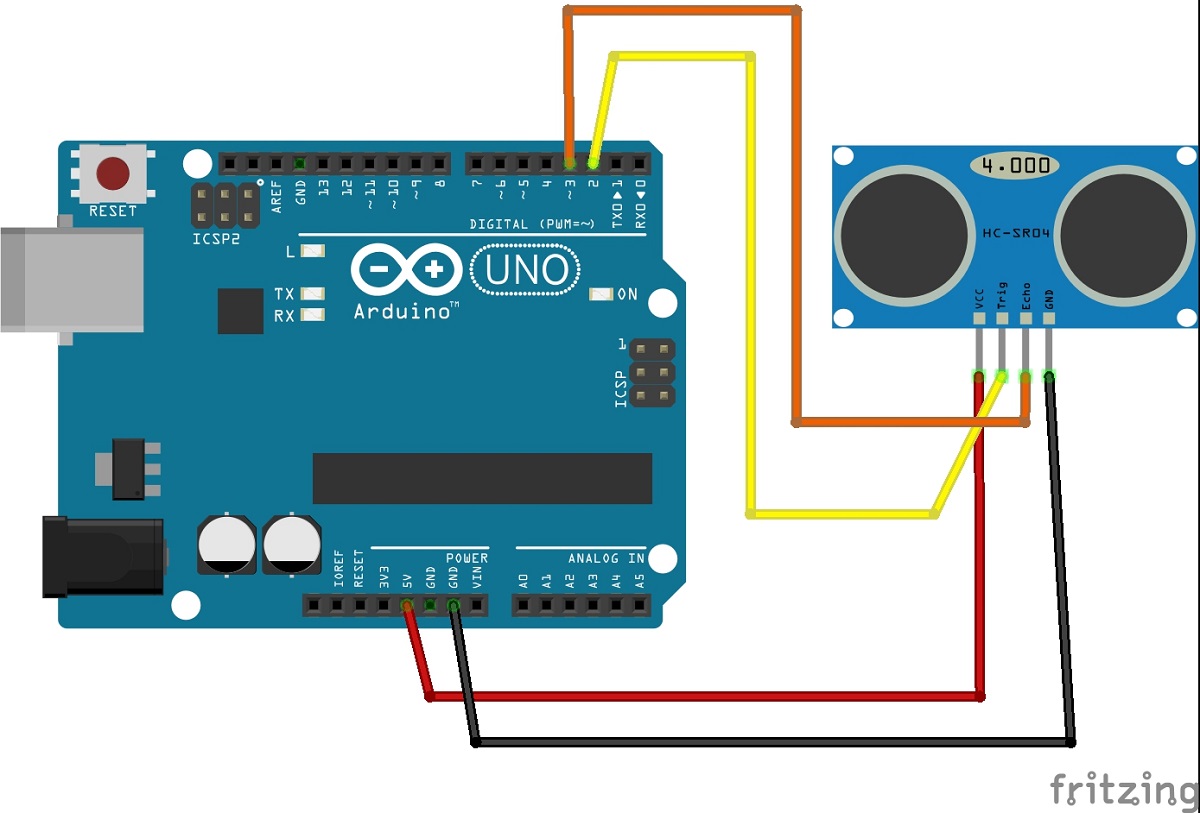
Wiring diagram for HC-SR04
Note: The sensor works with 5V supply voltage and needs very little power. So we can directly use the power supply of the Arduino board. The pin TRIG on the HC-SR04 is used to trigger the sound signal, the pin ECHO provides a HIGH signal as soon as the echo is received. We use pin 2 on the Arduino to trigger the sound signal, then we wait for the echo, which we query via pin 3 on the Arduino.
Arduino             HC-SR04
----------------------------
2                   TRIG
3                   ECHO
5V                  VCC
GND                 GND

Program for Distance Measurement
I have prepared two programs: a very simple program for beginners to programming and one that encapsulates the required functionality in a C++ class (see STEP 2).
Simple Program
Easy program that displays the value for the estimated distance in the serial monitor of the Arduino IDE.
void setup()
{
  Serial.begin(9600);
  Serial.println("Sensor - Test");
  // set pin 2 = trigger to output, pin 3 = echo to input
  pinMode(2, OUTPUT);
  pinMode(3, INPUT);
}

void loop()
{
    // Use pin 2 for trigger
    // Clears the trigPin condition
    digitalWrite(2, LOW);
    delayMicroseconds(2);
    // Sets the trigPin HIGH (ACTIVE) for 10 microseconds
    digitalWrite(2, HIGH);
    delayMicroseconds(10);
    digitalWrite(2, LOW);
    // Reads the echoPin (pin 3), returns the sound wave travel time in microseconds
    int duration = pulseIn(3, HIGH);
    // Calculating the distance
    int dist = duration * 0.017;
    // Displays the distance on the Serial Monitor
    Serial.print("Distance: ");
    Serial.print(dist);
    Serial.println(" cm");
    // wait half a second
    delay(500);
}
Running the Program
In order to generate the ultrasound we need to set the trigger pin to HIGH for 10 µs. That will send out ultrasonic sound which will travel at the speed sound and it will be received in the echo pin. The echo pin will output the time in microseconds the sound wave traveled. With the above formula we can then directly calculate the distance. The determined distance is then displayed in the serial moitor of the Arduino IDE.
