Tuning the System
Simply installing a flight controller and installing Ardupilot on it is unfortunately far from sufficient. The big advantage of Ardupilot is its customizability: you can change hundreds of parameters and adapt it to your own UAV. That's great, but you have to do it!
First Test
Unfortunately, the first flights were extremely unstable. There was always a lot of movement around pitch and roll, yaw hardly worked at all.
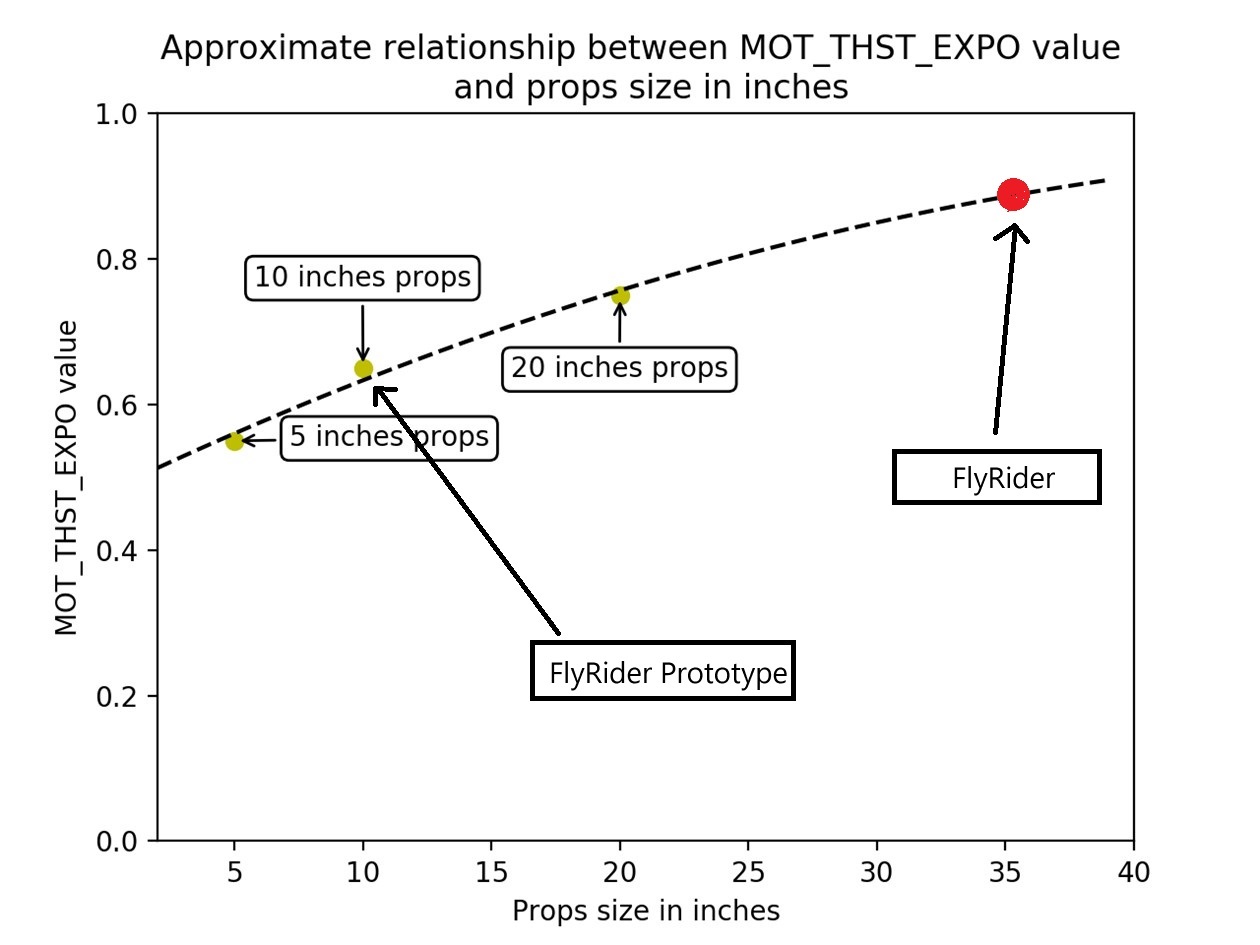
So I started to tune the Ardupilot. You can find all the relevant information on the Ardupilot website. You can use the graph below to estimate the correct MOT_THST_EXPO value for your aircraft.


PID Controller Setup
The next settings are meant to get your PID controller acceleration and filter settings into the right approximate range for your vehicle. These parameters are critical to the tuning process. The PID controller default values for axis P/D/I values are usually safe for first test hovers of most vehicles.
INS_ACCEL_FILTER: 10Hz
INS_GYRO_FILTER: 40Hz for 10 inch props
ATC_ACCEL_P_MAX: 110000 for 10 inch props
ATC_ACCEL_R_MAX: 110000 for 10 inch props
ATC_ACCEL_Y_MAX: 27000 for 10 inch props
I have changed INS_ACCEL_FILTER to 10 and INS_GYRO_FILter to 40 Hz.
Motor Setup and Vibration Check
it is very important to ensure that the thrust curve of your VTOL motors is as linear as possible. A linear thrust curve means that changes in the actual thrust produced by a motor is directly proportional to the thrust being demanded by ArduPilot.
MOT_BAT_VOLT_MAX: 4.2v x 4 Cells = 16.8 V
MOT_BAT_VOLT_MIN: 3.3v x 4 Cells  = 13.2 V
ATC_THR_MIX_MAN to 0.1
MOT_THST_HOVER to 0.25 (I had to set it to 0.35 to have enough thrust)
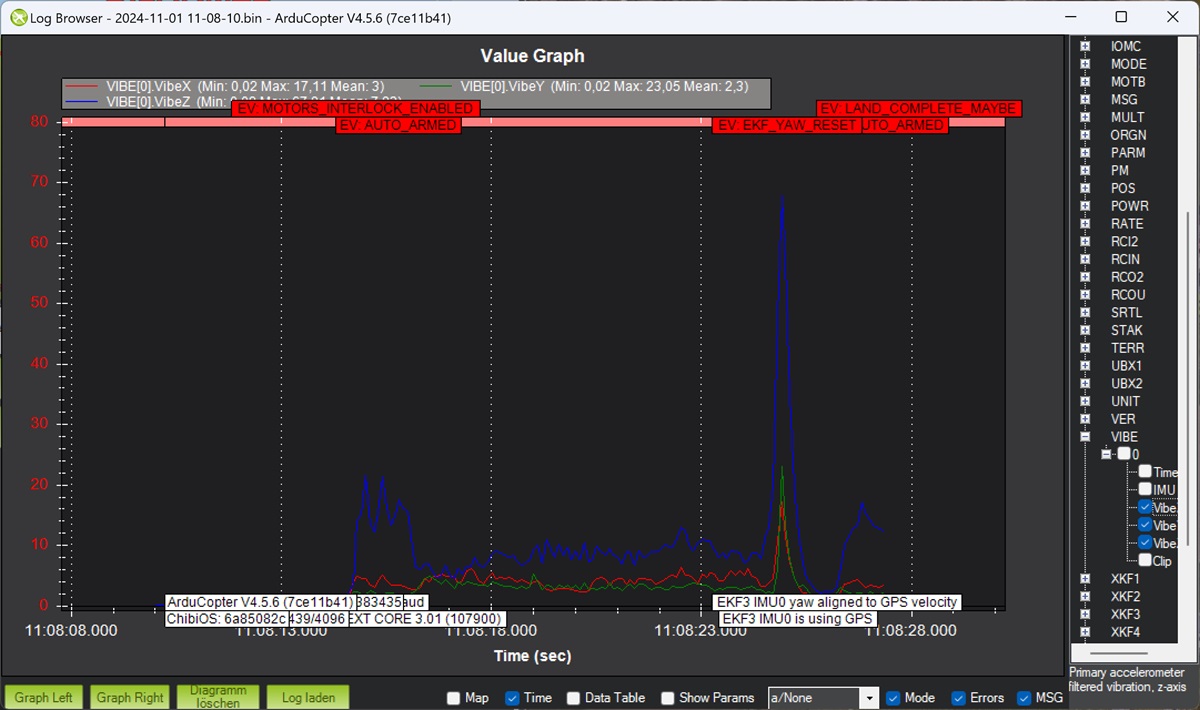
The vibrations are within the normal range (at least until the hard landing).
