Arduino Program for Bluetooth - Connection
The good thing is that on the Arduino side we do not have to distinguish whether we have a Bluetooth Classic or a Bluetooth LE device connected.
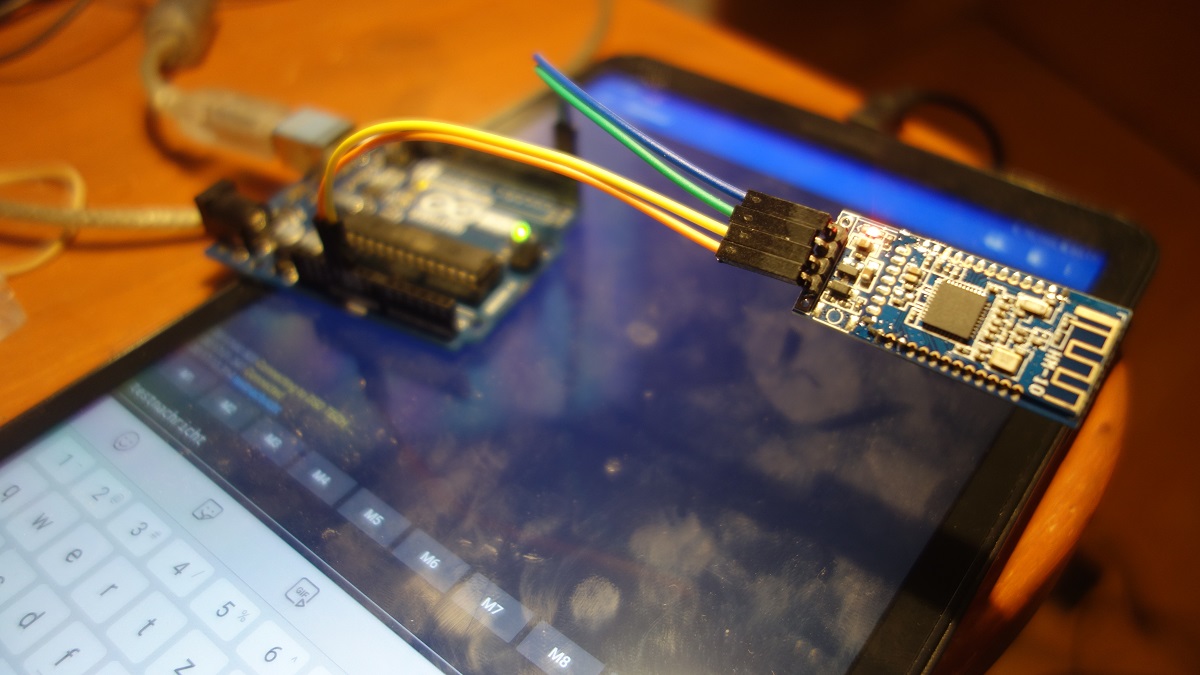
Required parts:
1 x Arduino Uno (or compatible)
1 x Bluetooth (LE) - module (Hm-10 or HC-05)
4 x jumper cable male - female
1 x Bluetooth enabled device with Bluetooth software
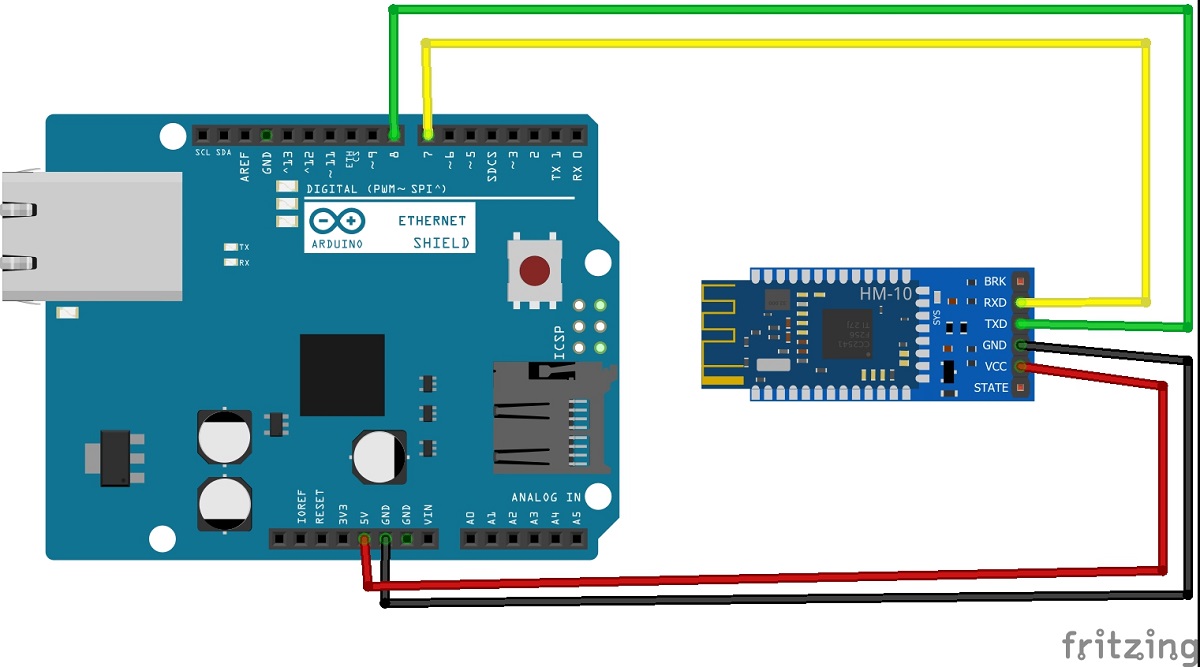
Wiring Diagram for HM 10 and HC-05
The below circuit diagram gives a basic idea how a HM-10 or HC-05 can be interfaced with Arduino UNO. The communication between the Arduino and the Bluettooth devices is done via the UART interface. UART stands for Universal Asynchronous Receiver/Transmitter. It is a hardware device used for serial communication between two devices. Connecting two UART devices together is simple and straightforward: Only two pins are required on each device. One pin is for transmitting data (TX pin) and the other is for receiving data (RX pin). We can only connect two UART devices together.
Arduino           HM-10 or HC-05
---------------------------------
7 (RX)             TX
8 (TX)             RX
5V                 VCC
GND                GND
Software
As always, the Arduino makes it easy for us to use the built-in UART hardware by using the serial object. The serial object has the necessary functions for an easy use of the Arduino’s UART interface. To communicate via the UART interface, we need to configure it first. The easiest way to configure the Arduino’s UART is by using the function Serial.begin(speed). The speed parameter is the baud rate that we want the UART to run.To check if there is data waiting to be read in the UART (or serial) buffer, we will use the function Serial.available(). Serial.available() returns the number of bytes waiting in the buffer.
// Bluetooth Connection Test
//

#include <SoftwareSerial.h>

// use pin 7 as RX and pin 8 as TX

SoftwareSerial bluetooth(7,8);


void setup()
{
  bluetooth.begin(9600);
  Serial.begin(9600);
  Serial.println("Bluetooth test running ...");
}

void loop()
{
  // wait for incoming data and print message to serial monitor
  if(bluetooth.available())
  {
    String msg = readStringFromBluetooth();
    Serial.print(msg);
  }
  // wait for the user to type a message into the serial monitor and
  // send it to the connected device
  if(Serial.available())
  {
    bluetooth.write(Serial.read());
  }
}

String readStringFromBluetooth()
{
  String message = "";

  while (bluetooth.available())
  {
    // read one character from serial connection and add to message
    char in_char = bluetooth.read();
    message = message + in_char;
  }
  return message;
}
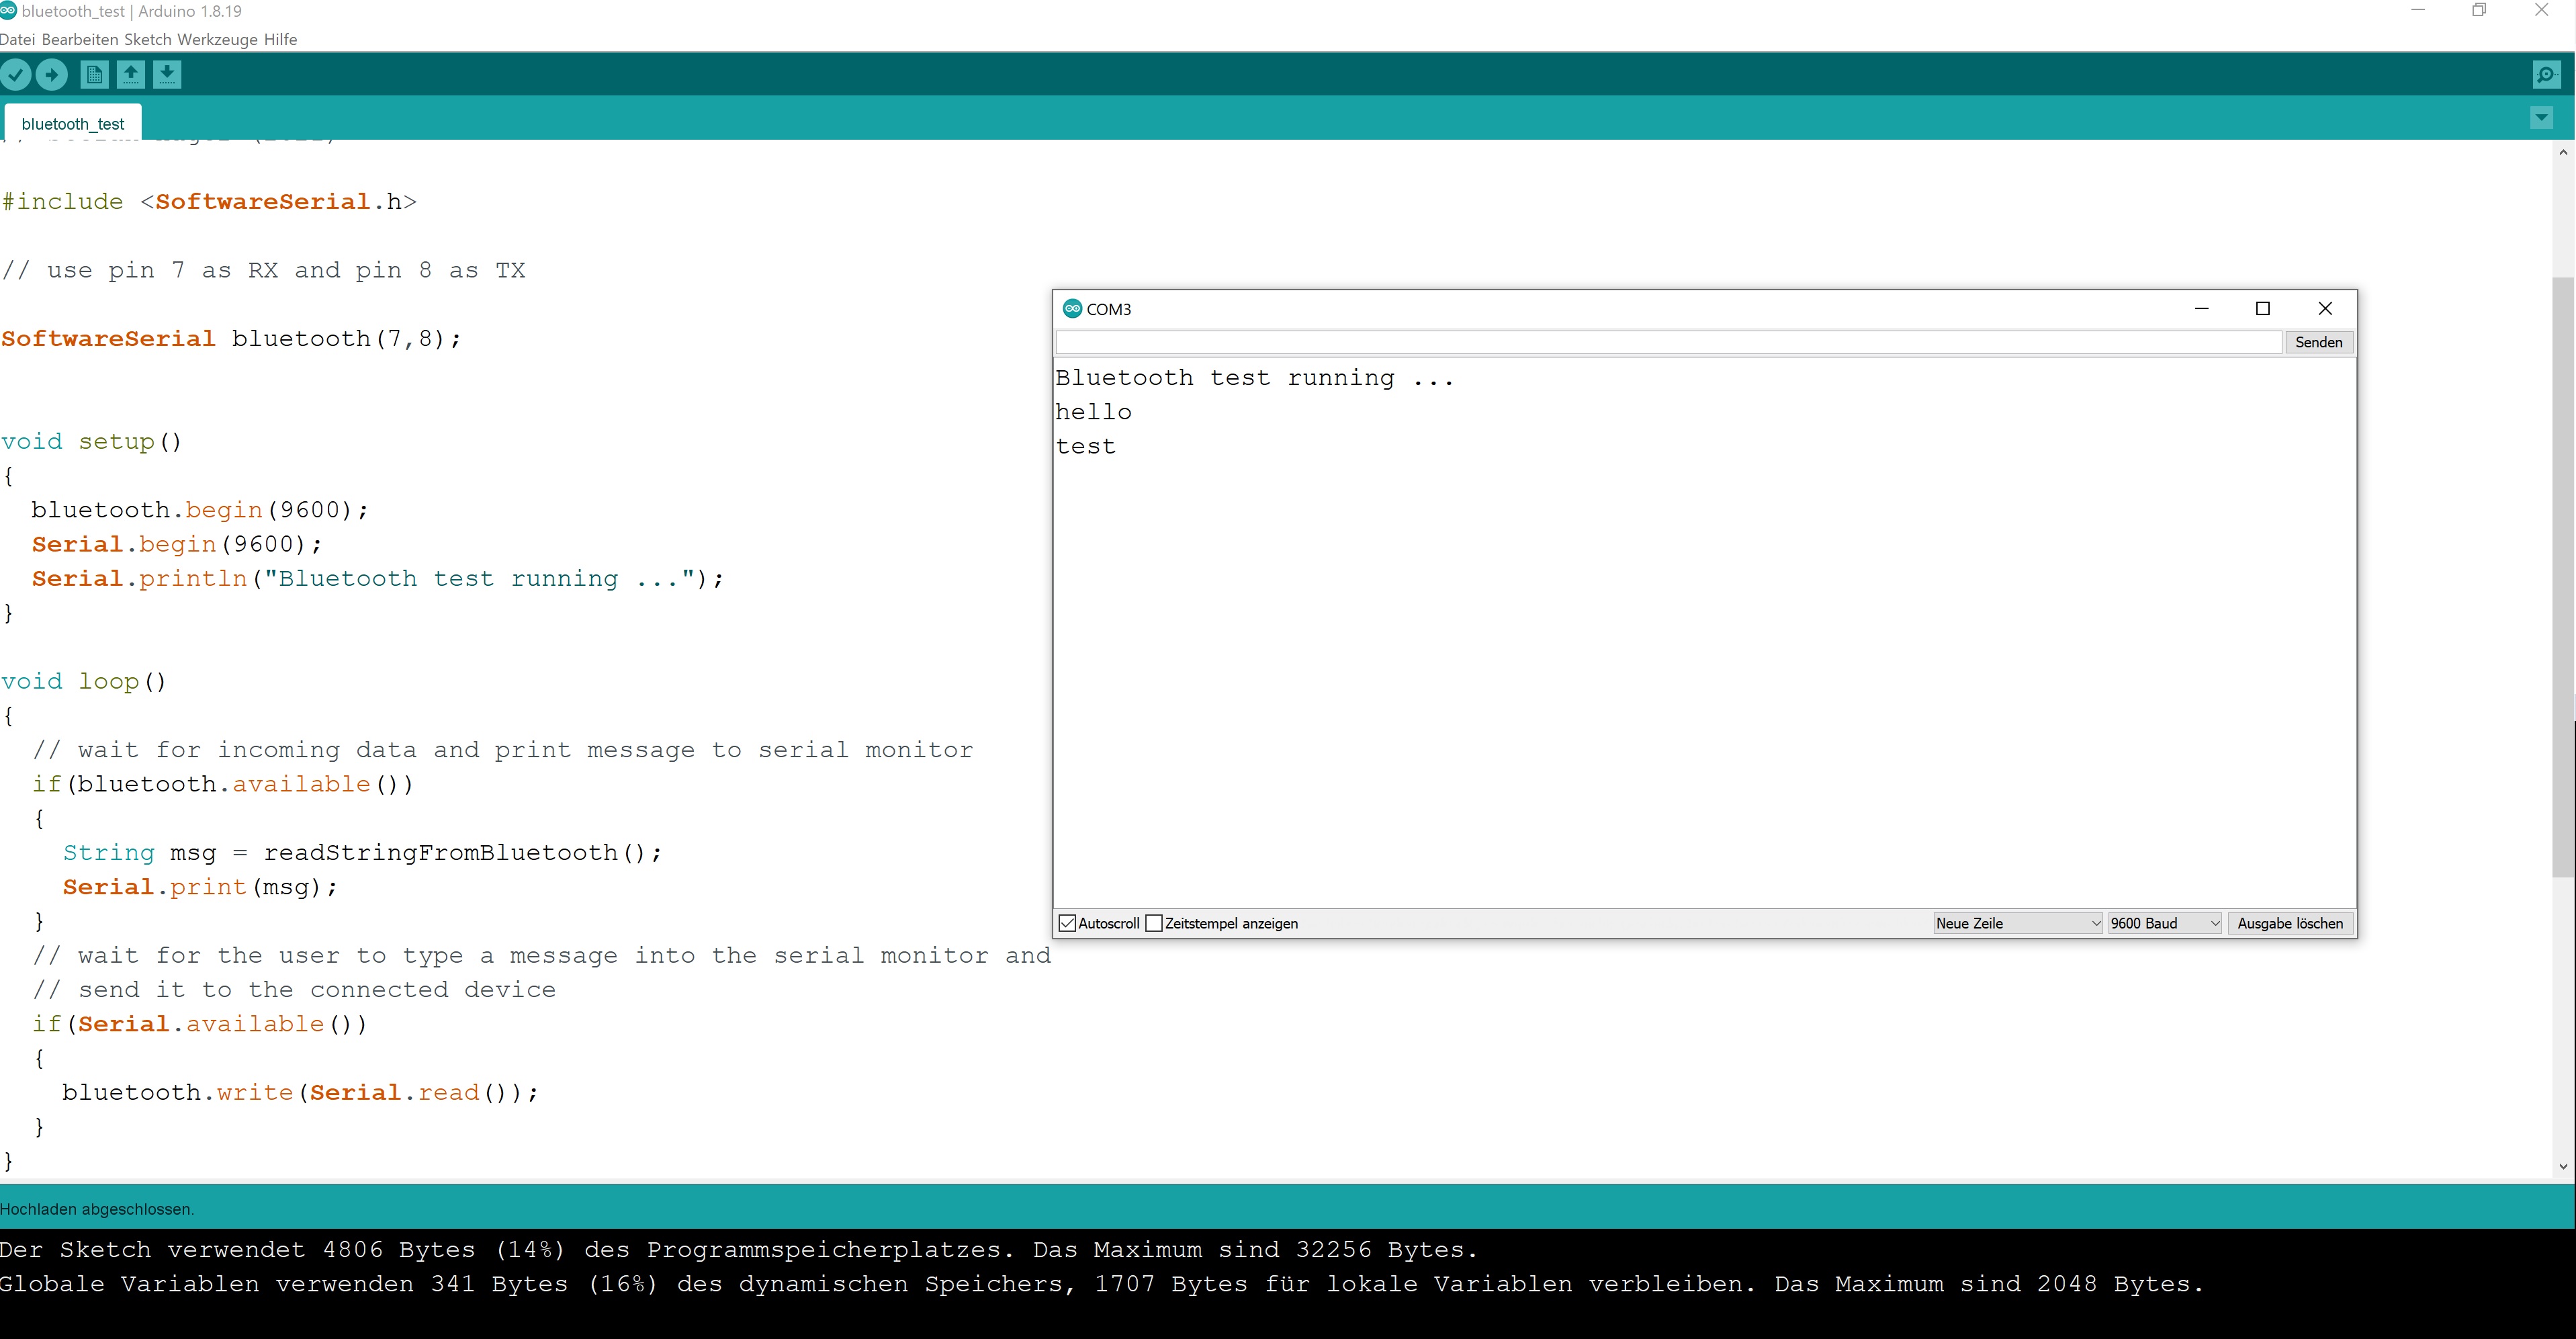
Running the Program
In order to be able to test the program, you need a bluetooth-capable device with a display, for example a cell phone or a tablet. On the device you need a software that can send data to the bluetooth interface of the device and display received data. You can use for example the "Serial Bluetooth Terminal" as software.
The test program displays all received data into the serial monitor window, any user input into the serial monitor are sent to the connected device.