Payload Release
Concept
There will be two options for releasing the payload: An operator can release the payload with a switch on the remote control. This is primarily intended for initial tests. The second option is to trigger when a predefined waypoint is reached. In this case, the point for dropping the payload must be set for a precisely defined GPS coordinate before the start of the flight.
Manual Release
Transmitter (Remote Control)
For manual triggering, a switch on the remote control must first be activated for this operation. Here i show how this works for OpenTX controls, for other systems this is of course not transferable 1 to 1. The only important thing is that there is a switch that can trigger a signal on a channel in the fligh controller.
With openTX you first have to define an input, the easiest way to do this is in the OpenTX Companion. The OpenTX Companion is a free software used for many different tasks like loading OpenTX firmware to the radio, backing up model settings, editing settings and running radio simulators.
To define an input, you have to connect the Companion to the remote control and then open the model for which you want to define the switch. To do this, you first need to know how the switches are named:
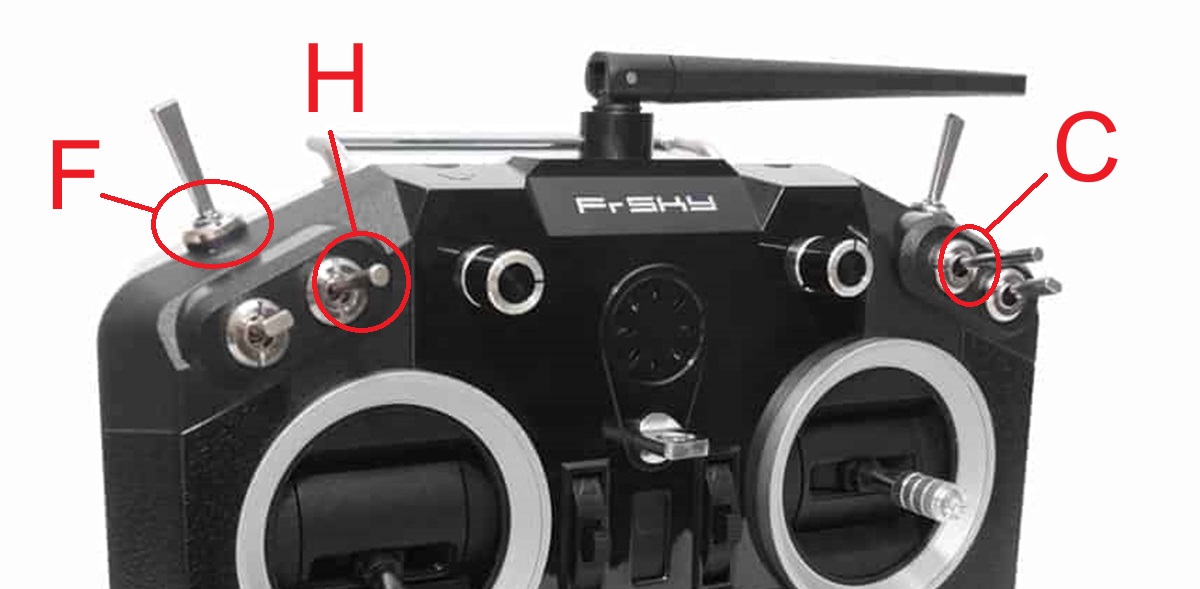
3 switches are defined on the model "testdrohne": switch F for arming the drone, switch H for selecting the flight mode and switch C for releasing the payload.
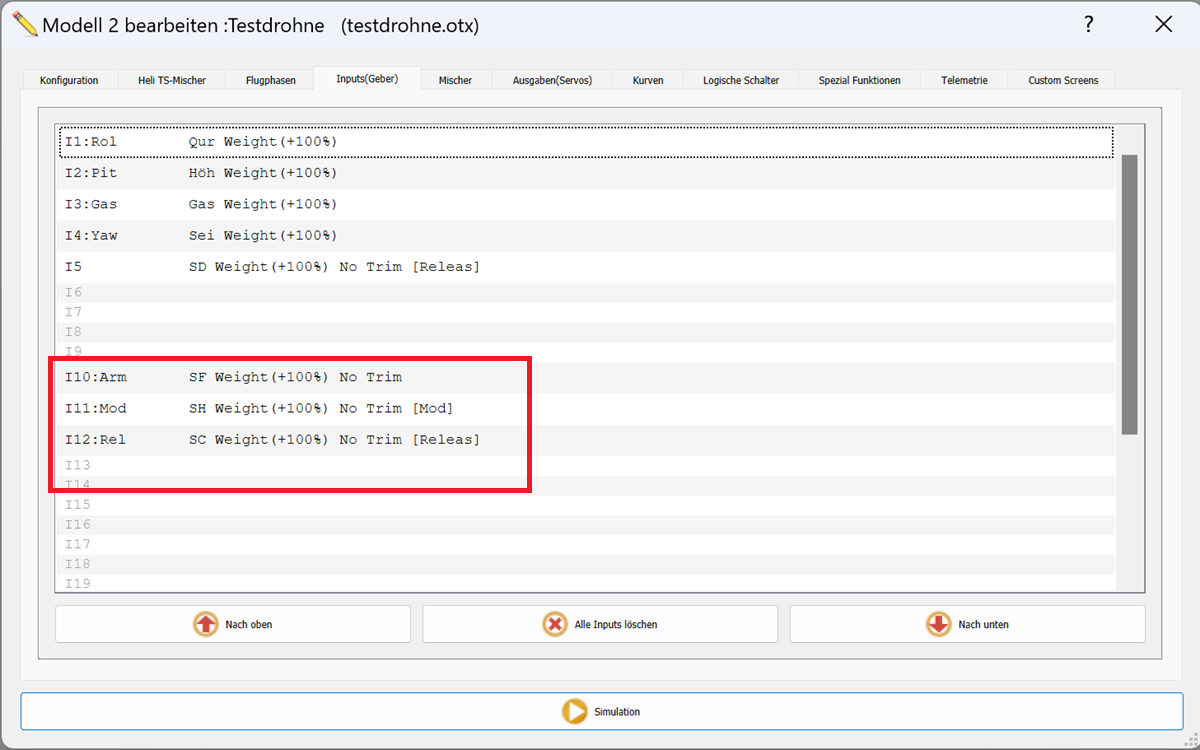
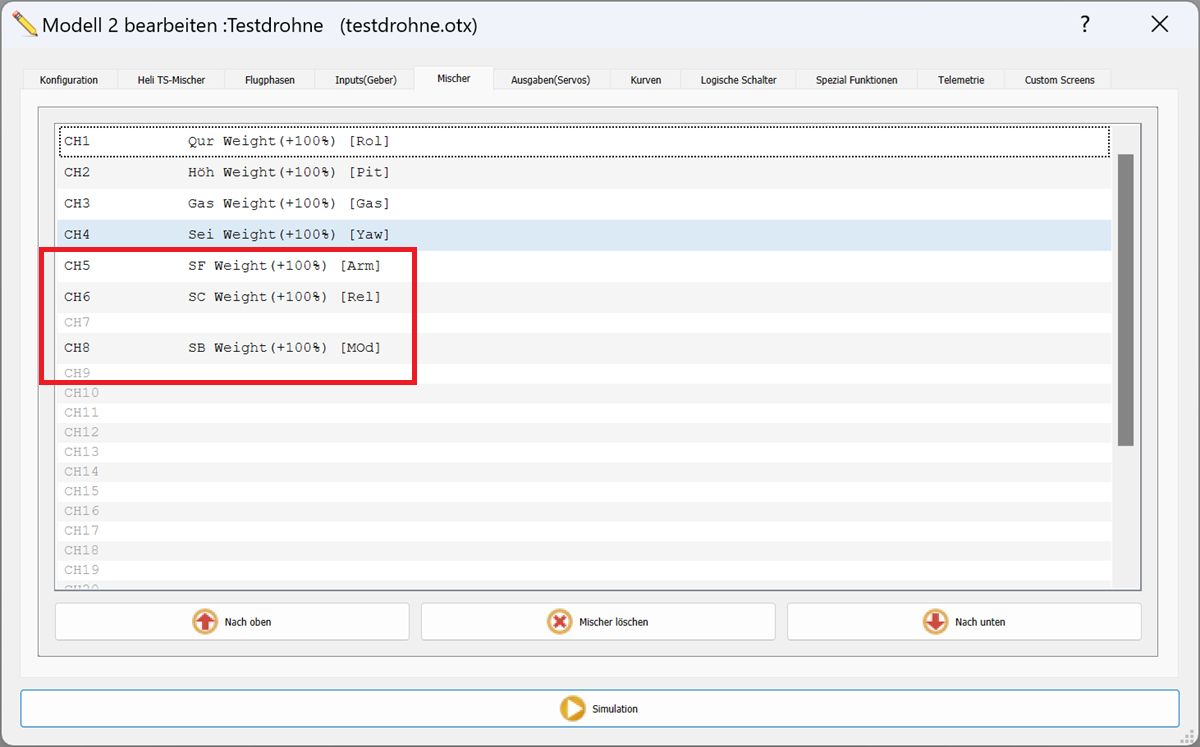
But the work is not yet finished at opentx : The logic of OpenTX now requires that you create a mixer. Even if you don't need the functionality of a mixer, but here you can assign the switch to a channel of the remote control. On the “Testdrohne”, arming is on channel 5, payload release on 6 and channel 8 is for selecting the flight modes.
Receiver (Drone)
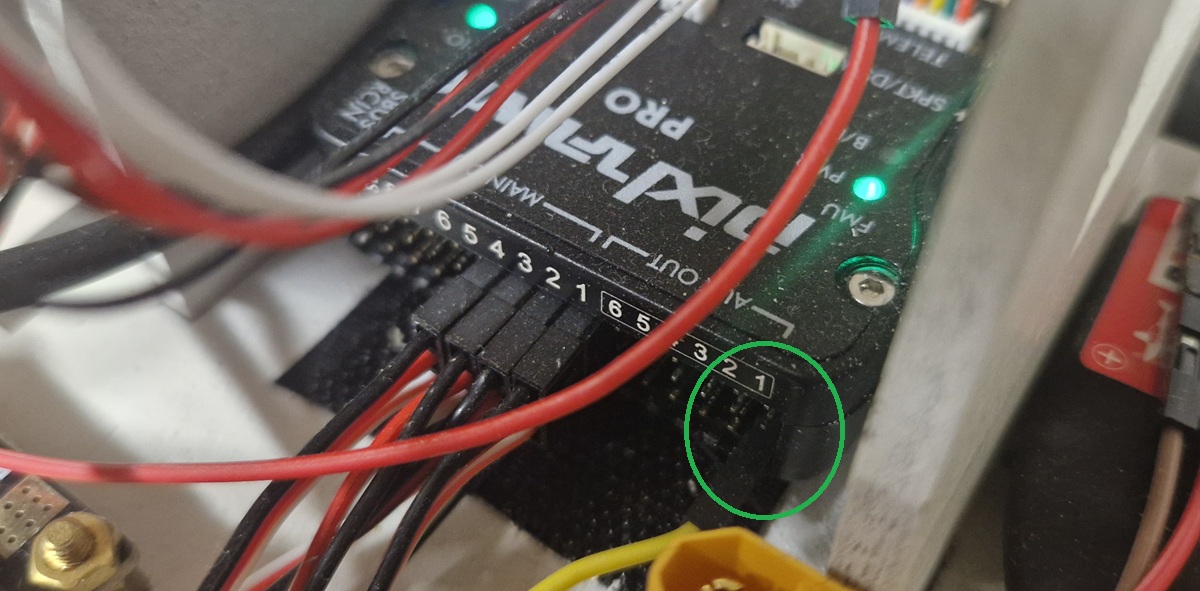
Of course, the servo must first be connected to the flight controller: If using "Ardupilot Copter" connect the servo to AUX OUT 1, 2, 3 or 4. MAIN OUT 1 ~ 8 should be avoided because these update at 400hz. In order not to load the flight controller with too high currents, i supply the servo with voltage from the PDB, not directly via the flight controller. I habe connected the servo to AUX 1.
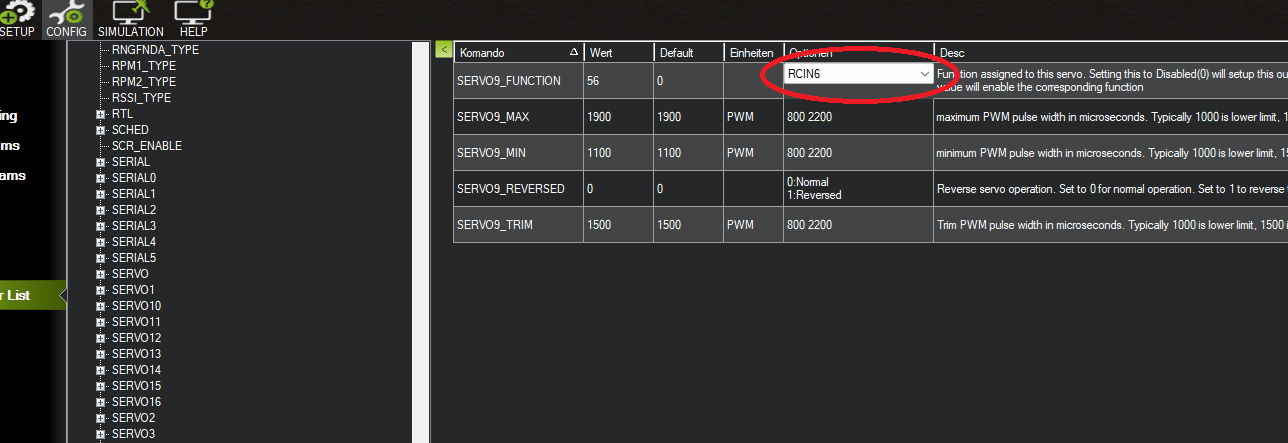
Now you need to configure the Flight Controller using the Mission Planner software: Connect your Pixhawk to Mission Planner. Use the "Setup" tab and check if your switch works. Then map the RC Channel to the AUX Output (if passthrough):
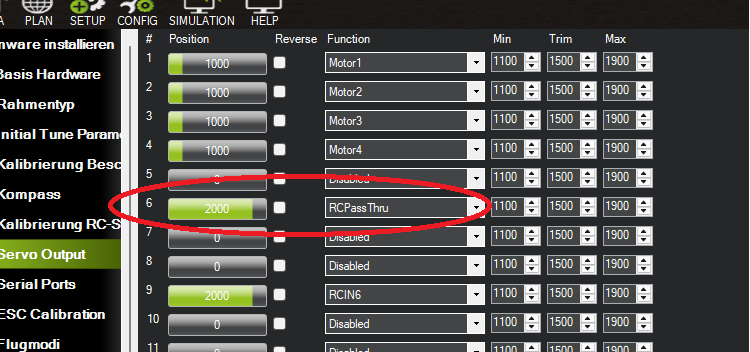
Now go to the "Config" tab and select "Full Parameter List" Find the parameter for the AUX channel you want to configure. For AUX1, the parameter is SERVO9_FUNCTION, AUX2 is SERVO10_FUNCTION, and so on... Assign the desired function to the SERVO9_FUNCTION parameter: