Evaluation
As we have already seen, the accuracy after training was very high at 97%. But now, of course, we would
like to know how well the recognition of the digits works in a test under real conditions.
we are developing a program in which the user can write a number in a user interface with the mouse. this number
is then converted into a suitable format for the neural network and classified by it.
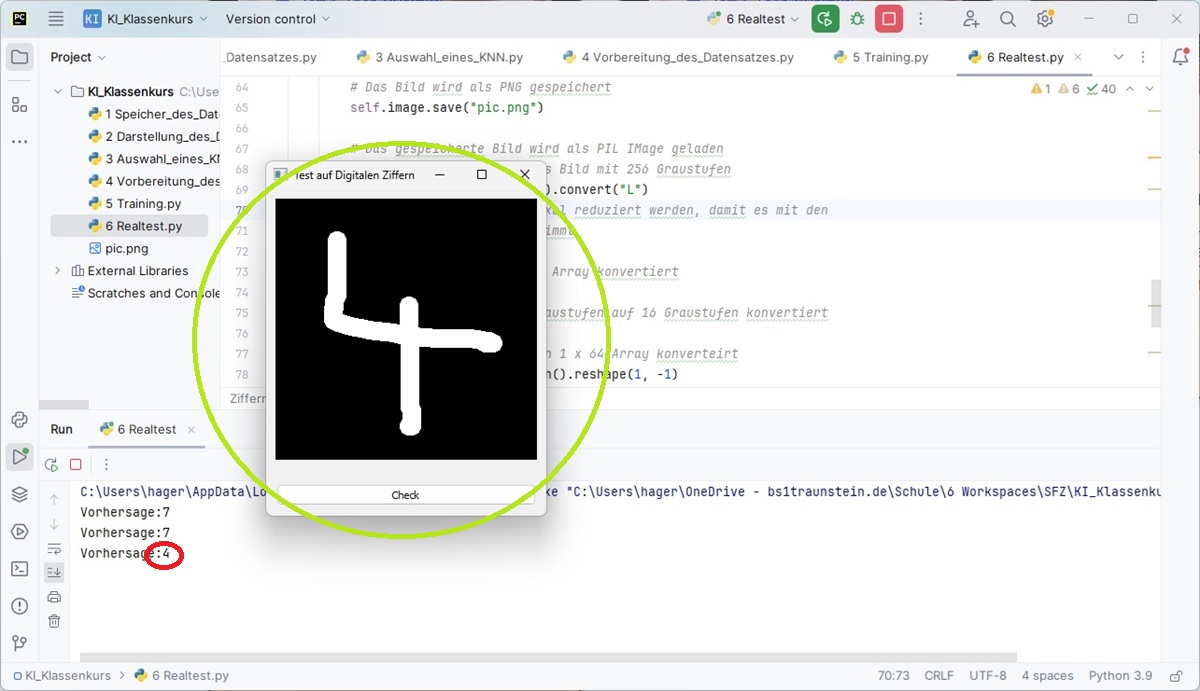
Test Application
The user can enter a number in the black field (green circle) and the prediction then appears in the console (red circle).
The complete source code for the entire program can be found at the end of the website.
Conversions
I would like to explain here the most important conversions that have to be carried out in order to convert the image from a QImage into a format that the NN can process.
QImage to PIL Image
The QImage format was used because it integrates well into the PyQT5 interface. Unfortunately, it is poorly
suited for further processing.
The PIL Image format would be better. A direct conversion between the two formats is relatively complex, so a
simple trick is used: save the QImage as PNG and then load the PNG file into a PIL IMage format.
self.image.save("pic.png")
img = Image.open("pic.png").convert("L")
The “convert” method turns the RGB image into an image in 256 gray levels.
Resize
Remember that our training data consisted of images with only 8x8 pixels. Of course we now have to convert this image into the 8x8 format as well.
img = img.resize((8,8))
Image to Array
Now we have an 8x8 pixel image, but it is still an image. Finally we need a 1 x 64 vector, as an intermediate stage we convert the image into an 8x8 array.img_data = np.array(img)
265 Grayscales to 16 Grayscales
Our array still contains data for pixels with 256 grayscales, but the training data only has 16 grayscales. Fortunately, the conversion from 256 to 16 is very simple: you just divide by 16!img_data = img_data / 16
From 8x8 to 1 x 64
Now we are almost finished: the 8x8 array only needs to be converted into a 1 x 64 vector, which is done by the “flatten” method of numpy.img_data = img_data.flatten().reshape(1, -1)Now we can load the NN with the vector to get a prediction and output it to the console:
prediction = self.model.predict(img_data)
print("Vorhersage:" + str(prediction[0]))
Complete Code Example
To start the program, the PyQt5 and the Pillow (PIL) libraries must be installed:pip install PyQT5 pip install pillowJust copy the code and let it run!
import sys
from PyQt5.QtWidgets import QApplication, QWidget, QPushButton, QVBoxLayout
from PyQt5.QtGui import QPainter, QPen, QImage
from PyQt5.QtCore import Qt, QPoint
import numpy as np
from PIL import Image
import joblib

class Ziffern_Test(QWidget):
    def __init__(self):
        super().__init__()
        self.setWindowTitle("Test auf Digitalen Ziffern")
        self.setGeometry(100, 100, 300, 350)

        # Bild auf dem gezeichnet wird
        self.image = QImage(280, 280, QImage.Format_RGB32)
        self.image.fill(Qt.black)

        self.drawing = False
        self.last_point = QPoint()

        # Button für Überprüfung
        self.button = QPushButton("Check")
        self.button.clicked.connect(self.check_digit)

        # Vertikales Layout erstellen
        layout = QVBoxLayout()
        layout.addStretch()
        layout.addWidget(self.button)
        self.setLayout(layout)

        # Modell laden
        self.model = joblib.load('digits_model.pkl')

    def mousePressEvent(self, event):
        self.drawing = True
        self.last_point = event.pos()

    def mouseMoveEvent(self, event):
        if self.drawing:
            painter = QPainter(self.image)
            pen = QPen(Qt.white, 20, Qt.SolidLine, Qt.RoundCap, Qt.RoundJoin)
            painter.setPen(pen)
            painter.drawLine(self.last_point, event.pos())
            self.last_point = event.pos()
            # trigger paint event
            self.update()

    def mouseReleaseEvent(self, event):
        self.drawing = False

    def paintEvent(self, event):
        canvas = QPainter(self)
        canvas.drawImage(10, 10, self.image)

    def check_digit(self):
        # Konvertierung des Qimage in ein PIL Image:
        # Das Bild wird als PNG gespeichert
        self.image.save("pic.png")

        # Das gespeicherte Bild wird als PIL IMage geladen
        # das convert("L") lädt das Bild mit 256 Graustufen
        img = Image.open("pic.png").convert("L")
        # Das Bild muss auf 8x8 Pixel reduziert werden, damit es mit den
        # Trainingsdaten übereinstimmt
        img = img.resize((8,8))
        # Das Bild wird in ein 8x8 Array konvertiert
        img_data = np.array(img)
        # Das Bild wird von 256 Graustufen auf 16 Graustufen konvertiert
        img_data = img_data / 16
        # Das 8x8 Array wird in ein 1 x 64 Array konverteirt
        img_data = img_data.flatten().reshape(1, -1)
        # Das konvertierte Bild wird in das NN Netz geladen und das Netz macht seine Vorhersage
        prediction = self.model.predict(img_data)
        print("Vorhersage:" + str(prediction[0]))

        # Für neue Zeichnung leeren
        self.image.fill(Qt.black)
        self.update()

if __name__ == "__main__":
    app = QApplication(sys.argv)
    fenster = Ziffern_Test()
    fenster.show()
    sys.exit(app.exec_())